When installing posts into the ground we would recommend using post mix. Post mix is a pre-blended, factory-produced, quick-setting concrete available from most builders’ merchants.
It is important that while digging holes for the posts that they are dug along a completely straight line and the correct distances apart. Generally, fence and trellis panels sit in between the posts, whereas the slatted panels sit to the face (front) of the posts. One way to ensure the posts are installed straight is to set up a string line along the proposed line of the fence.
As a general rule, the posts need to be set approximately 600mm (2ft) into the ground. After the hole is dug place the post into the ground using a spirit level to make sure the front of the post is carefully aligned along the string line. Back fill the hole with post mix, following the instructions provided on the bag. Adjust the post into position and support appropriately for approximately 10 minutes until the post mix sets.
Unless the panels are staggered to accommodate different ground levels, it is important to check that the tops of each post are at the same height. A suitable piece of straight timber can be placed along the top of the posts with a spirit level positioned on the centre of this wood allowing the levels to be checked.
After checking that the first posts are correct the rest of the posts can be installed. With quick-setting post mix it is possible to erect posts and panels consecutively. While placing additional posts it is recommended that you use the wood and spirit level constantly to check that the top of every fence post is at the correct height for the panels.
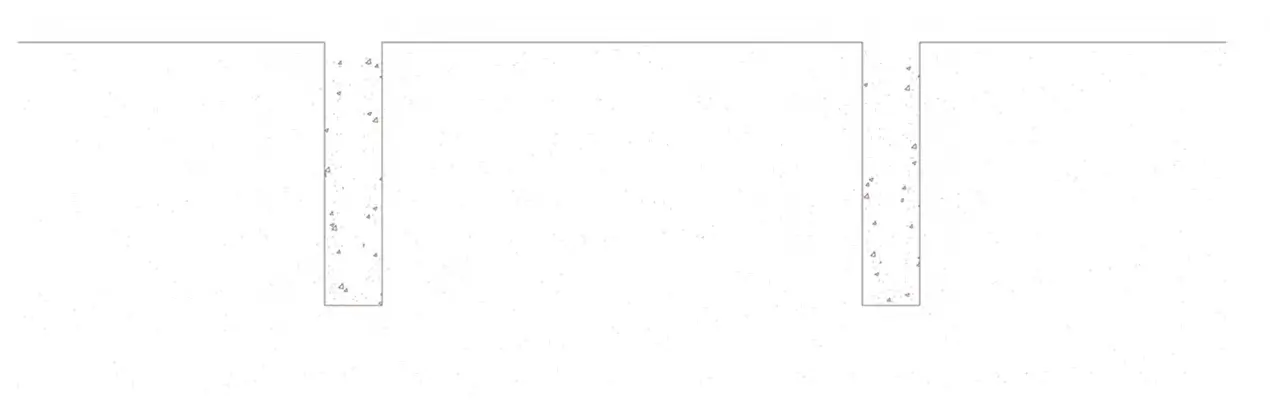
Step 1
Use a string line to provide a guide for the position of the posts. Mark out and dig holes for the posts. For our 70mm x 70mm post we recommend a hole 200mm in diameter by 600mm depth.
(Side view)
Step 2
Insert post. Use spirit level to ensure it is level in both directions and correctly positioned against the string line. Posts need to be set at the correct width.
(View from above)

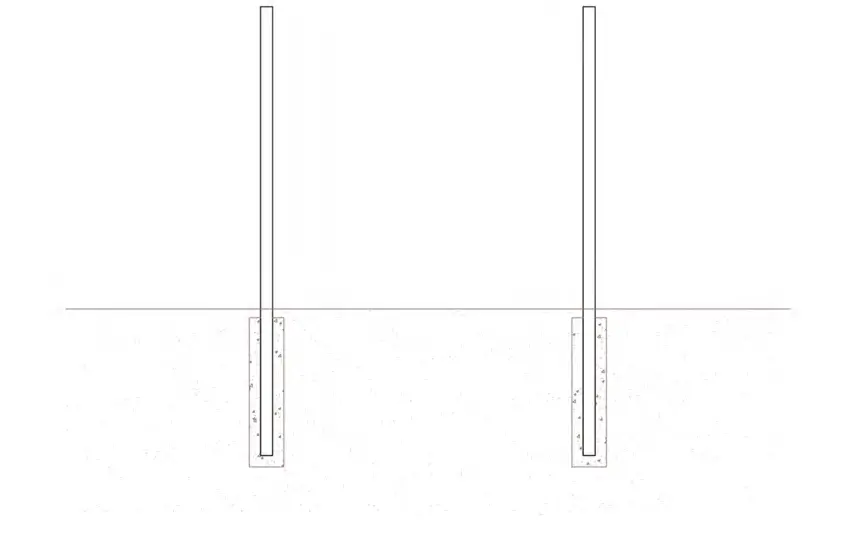
Step 3
Fill the hole with post mix (use manufacturer’s instructions). Adjust post into position and support until post mix sets.
(Side view)
Step 4
Please check that tops of each post are at a uniform height, unless there is a change in heights required.
Step 5
Repeat steps 2-4 as needed. Use spirit level to check each post is at correct height for panels.
(View from above)

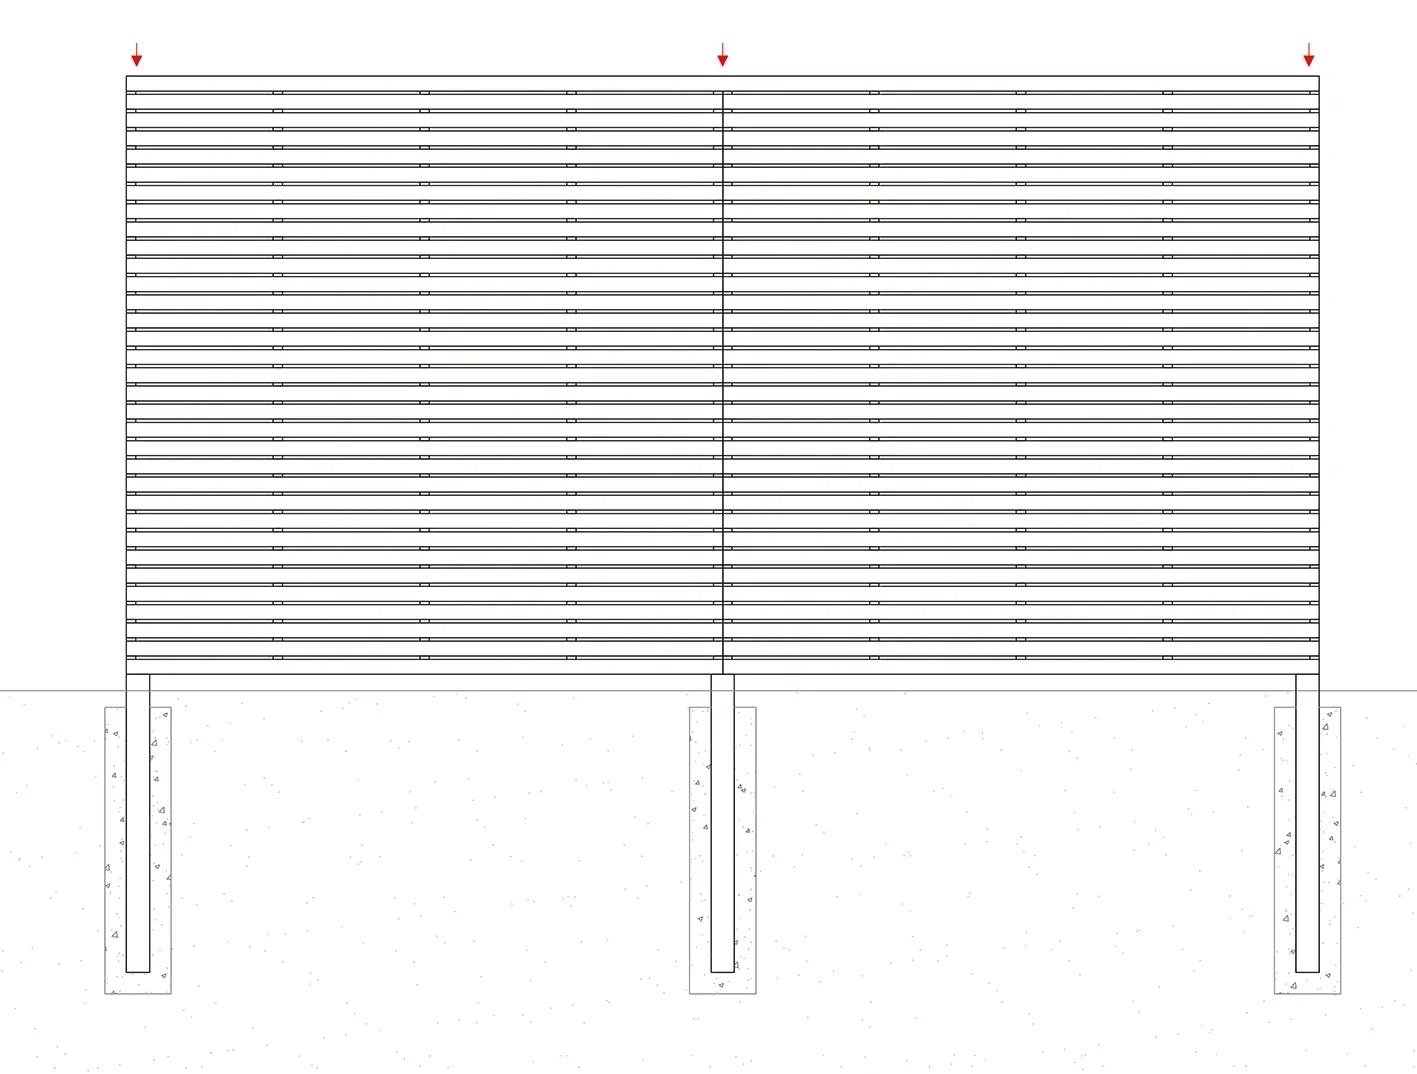
Step 6
Screw panels into posts using 4.5mm x 50mm stainless steel screws (minimum of two per side). Screw through the gap between slats (if possible), or directly through the horizontal slat. Slatted panels fix onto the face of the posts. Ensure the top of each panel is level. Additional panels meet over the centre of the post, with the first and last sitting flush at the ends.
(Side view)
(View from above)

Step 7
If installing top capping, align with front slat of panel and screw down into top of posts and centre vertical (if possible) using 4.5mm/5mm x 100mm stainless steel screws (this can be plugged and filled if preferred).